I first realized that I would like to and need to learn about containers when at one of the interviews I had I was asked if I had worked with containerized applications (I hadn’t). In my current team, there has been some conversation about deploying applications using Docker in the near future. So I have started to familiarize myself with Docker containers and images, starting from the basics.
Key points from the first week of learning:
- a container has its own virtual network
- you can interact with the container by name or ID
- Docker images provide a filesystem called a union file system; it consists of OS/Framework files and additions/modifications to original files. The user operates in the topmost layer (writeable layer), so if a change is made to a file, that file is copied into the writeable layer and a record of difference between those two files is saved too. This is called “the copy-on-write” (CoW) strategy (easy to remember – moooooooo!)
- Docker images are layered
- Docker images are downloaded into an image cache – the system can detect if an image has changed and then rebuild the layers
- not all Docker repositories support “latest” tag (which is used by default when you pull an image). Example:

In this case you need to use a specific tag
docker pull mcr.microsoft.com/windows/servercore:ltsc2019
Useful commands to learn:
- choco install docker-cli -y </code installs docker cli
- docker pull IMAGE_NAME or REPO_NAME gets an image by name/repo name in Dockerhub
- docker ps (-a) shows active containers ; (-a) shows all active and stopped containers
- docker images shows available images
- docker run [OPTIONS] IMAGE_NAME spins up a container based on an image. Some options are:
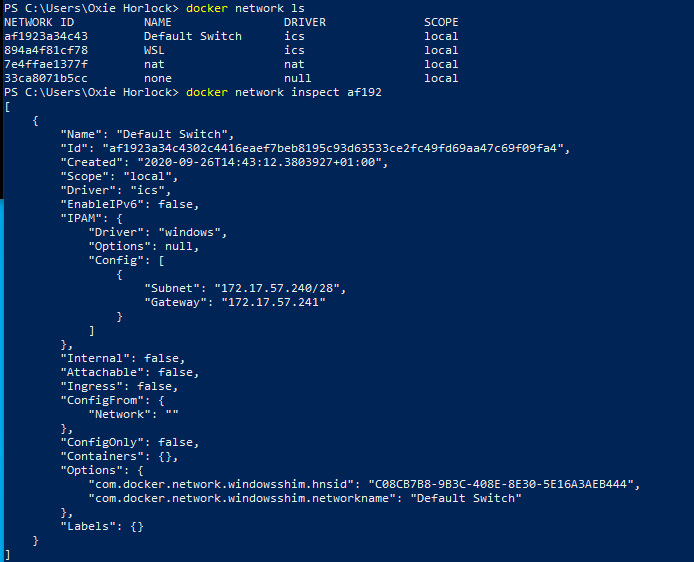
- docker inspect network CONTAINER_ID_OR_NAME shows container network info:
- docker cp SOURCE_PATH:/DESTINATION_PATH copies files from a host to a path in the container
- docker commit CONTAINER_ID_OR_NAME REPO_NAME:TAG creates image from an existing container
- docker build -t myimage:v1 . builds an image from a Dockerfile. Full stop at the end means “build context”, i.e. files located in a specific path. -t tags the new image
- docker diff IMAGE_INAME shows changes in files for an image
- docker tag myimage:v1 oxiehorlock/myimage:v1.dev (correct tagging to be published on Docker hub) (oxiesImage:v1 is a source image and oxiehorlock/myimage:v1.dev is a target image)
- docker push oxiehorlock/myimage:v1.dev pushes an image to a repository (in this case the repository name is oxiehorlock, an image is oxiesImage with a tag v1.dev); you need to do docker login before pushing
- docker stop CONTAINER_ID_OR_NAME
- docker rm CONTAINER_ID_OR_NAME removes a container (can also chain names/ids to remove multiple containers)
- docker rmi IMAGE_NAME removes an image
-d detached mode, i.e. console won’t be attached to the I/O of the process
-p PORT_ON_HOST:PORT_IN_CONTAINER maps a port on host to a port on container
-v PATH_TO_MAP_ON_HOST:/PATH_TO_MAP_IN_CONTAINER – mount a volume and map it to a directory on host
–rm clean up flag (removes container after you are done; also removes volume)
–it starts a shell inside the containerdocker stop myContainer