I’ve wanted to have my own blog for a while and have had a lot of ideas about how I wanted to create it and experiment with different tools and services. However, since having a child, free time (i.e. learning and exploring time) has become a really precious commodity. So I knew that the sooner I launched the website, the better. The final little nudge was reading Steve Gordon’s post about blogging which you can find here. And, voila, here I have my blog up and running, and I’m writing my first ever blog post!
Time constraint has been the main reason why I chose using WordPress and AWS Lightsail. I was quite surprised by how easy and quick it was to set everything up. I will share my experience in this post.
Prerequisites: AWS account
Creating a server
I followed this tutorial up to part 6: https://aws.amazon.com/getting-started/hands-on/launch-a-wordpress-website/ to create a WordPress instance and attach a static IP to it. It is very easy and clear. FYI, Bitnami is an application stack that lets you host a WordPress website. So when you select the WordPress blueprint in AWS Lightsail, you are installing all the applications necessary to run WordPress on your server.
I had bought a template to use, so after logging in to WordPress admin dashboard, I navigated to Appearance->Themes->Add new ->Upload, and uploaded my theme. The website was up on the internet and could be navigated to on the Internet by using its IP address! Wasn’t it supereasy?
Registering a domain name/creating DNS records
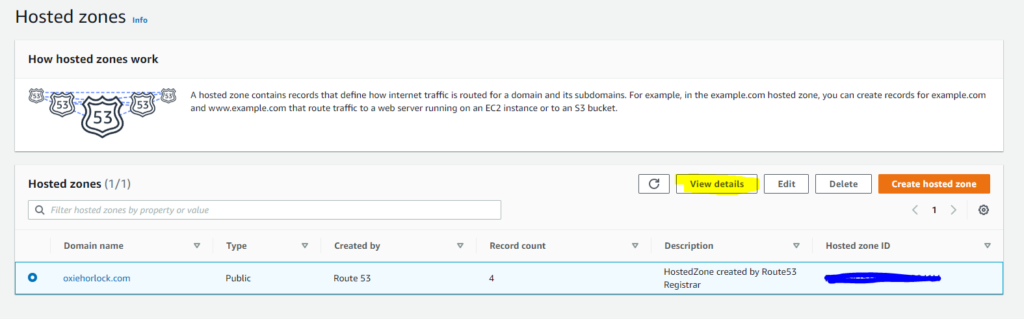
I didn’t have a domain name, so I registered oxiehorlock.com using AWS Route 53, which is a Domain Name Service. Before you register a domain, you should check the pricing here https://d32ze2gidvkk54.cloudfront.net/Amazon_Route_53_Domain_Registration_Pricing_20140731.pdf – it varies depending on the top-level domain (the last part of the url, for example .com, .org.uk). When registering a domain, a public hosted zone is created for you. This hosted zone has records about routing Internet traffic for your domain/subdomains. Two records will be created by default:
- type NS record – a nameserver record; it tells the Internet where to go to find out a domain’s IP address. There are several NS values – this is to ensure that if one name server is not available, the queries can go to another one.
- type SOA – a Start of Authority record; it contains some DNS information about the hosted zone, such as name name server that created the record, a serial number that you change when you can increment when you update the zone, retry interval and so on (info on record types AWS supports is here https://docs.aws.amazon.com/Route53/latest/DeveloperGuide/ResourceRecordTypes.html)
After that I created an A record in my hosted zone. An A record is the most fundamental record and it routes traffic to a resource such as a web server. I mapped my brand spanking new domain name to the static IP of my WordPress instance
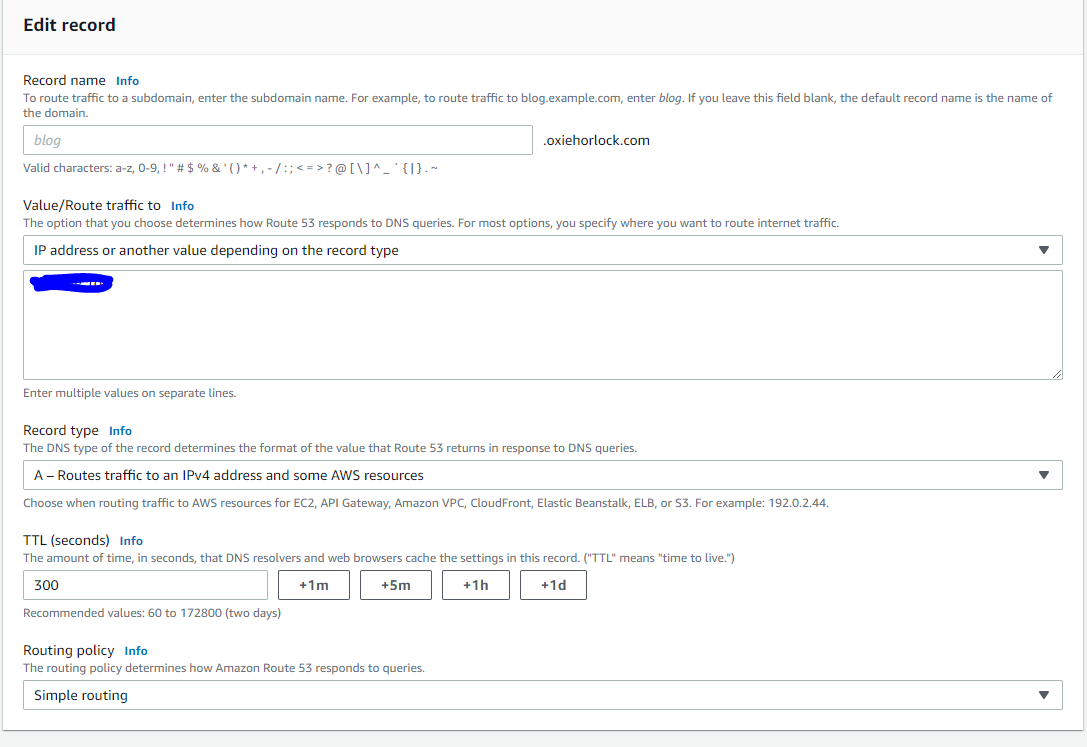
After that oxiehorlock.com was navigable on the Internet.
Making the site secure
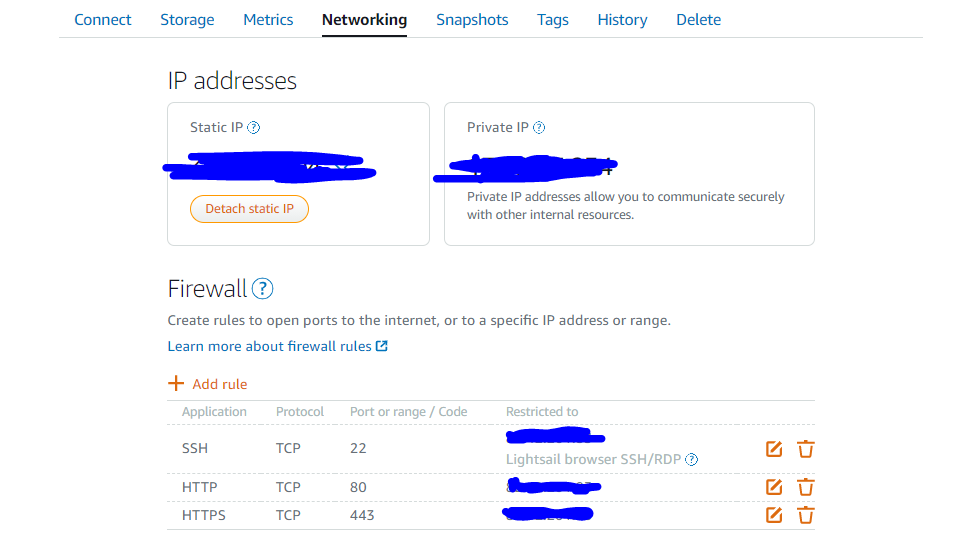
First of all, I restricted access for port 22 to my own IP address (so that nobody else could SSH into the instance). I also didn’t want anyone to be able to access the empty blog so I restricted HTTP/HTTPS access to my own IP address too. These rules can be changed using the Networking tab of the Lightsail Console:
I followed these tutorials to create an SSL certificate, firewall rules and securing the site using Cloudflare:
https://dannys.cloud/hardening-a-wordpress-website-on-aws-lightsail-2176
Useful tip: since the instance runs on Linux, I had to use CLI. I don’t have a lot of experience with it; the most tricky thing was editing and saving files. The easiest way for me was to run sudo nano path/to/file command, edit the file, type Ctrl+X, and then Y or N, or Ctrl+C to Cancel.
To be able to use Cloudflare for DNS management, AWS name servers for the NS record in your hosted zone need to be changed to Cloudflare name servers. You would think that you would just go to the hosted zone, select the NS record from the list, and edit it, right?. However, after waiting for a couple of days for the record to be updated, I started investigating what was wrong. It turned out the records needed to be changed from the Registered domains page:
I also removed Bitnami banner from the bottom right hand corner of the site pages by following the steps from this guide:
https://docs.bitnami.com/aws/how-to/bitnami-remove-banner/
Costs
The pricing for deploying a WordPress on AWS Lightsail in the way that I did comprises:
- domain registration cost ($12)
- a monthly instance plan ($3.50)
- half a dollar per hosted zone per month
- DNS queries less than half a dollar per 1 000 000 000 queries (this will also include you using the site, for example amending the theme).
Phew! I can’t actually quite believe that I have finished writing my first blog post. I sincerely hope my experience will help somebody out there to make deploying a WordPress website plan sailing.